

View the quick print version here: Quick Start Guide
Need more guidance? You can download the full version here: Inventory Analyst Full User Manual.pdf
Inventory Analyst: Quick Start Guide
- Log in to Inventory Analyst with username and password
- Go to Admin > Catalog > Parts Click “Choose File” button
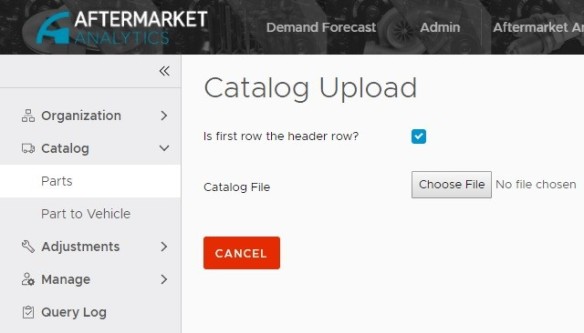
- Select desired parts catalog .csv file
- Go to Admin > Catalog > Part to Vehicle
- Click “Choose File” button
- Select desired parts catalog .csv file
- Go to Demand Forecast > Build > Regions

- Select desired regions for query either by:
- typing in said regions to “Add Regions,” or
- selecting them directly on the map
- Go to Build > Vehicles and make proper selections (Vehicle Type, Make, etc.), “Add” them to the query and click “Next”
- Go to Build > Parts and select your desired search filters (Part Number, Part Type, etc.), “Add” them to the query and click “Next”
- A “Preview” page will appear, review your search parameters
- Click the “Run Demand Estimate” button to run query
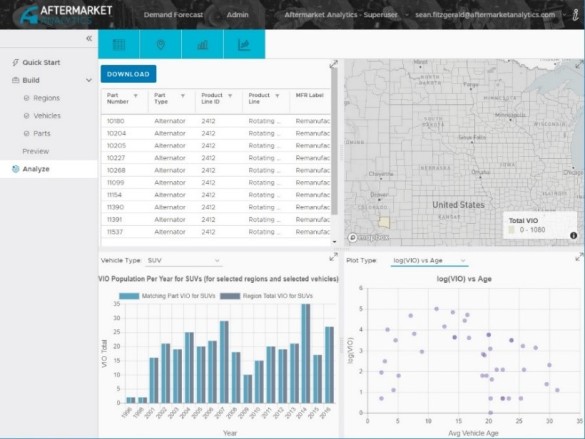
- A four-square display of various results will appear:
- (1) A table of various parts and part categories
- (2) A map with selected regions
- (3) A histogram with VIO population and matching parts (by vehicle type)
- (4) A scatter plot with VIO data (which can be altered to display other, various data types)
- Go to Admin > Adjustments > Replacement Rates in order to view Replacement Rates:
- Acquire rates for various part categories by using the dropdown
- Filter data by vehicle types by utilizing the radio buttons designated for that purpose
- Enter in coefficients into lines designated
- Go to Admin > Adjustments > County Adjustments in order to upload a County Adjustment file
- Go to Admin > Adjustments > Vehicle Adjustments in order to upload a Vehicle Adjustment file
- Select desired part category from the dropdown
- Make selections from the various tables which open (Vehicle Types, Makes, Models, Years)
- Click the “Upload Vehicle Adjustments” button which opens dialog with the “Choose File” button
- Go to Admin > Organization > Info to view general Organization info
- Go to Admin > Organization > Issues to view a summary status of current state of various catalogs
- Go to Admin > Organization > Roles to create roles and to:
- set specific permissions for each role by selecting button for new role and utilizing the checkboxes which appear adjacent to each various permission
- Go to Admin > Organization > Teams and add new teams by clicking “Add Team” button and filling out a name and description of team
- Go to Admin > Organization > Users and create a new user by clicking “Create User” button
- Enter email, assign a role (from dropdown) and add user to a team
